DIY Cedar Shake Roof Leak Repair
Our Guide to DIY Cedar Shake Roof Repair for Leaks
Cedar shingles can bring natural beauty to any home. Their durability and eco-friendly nature make them a popular roofing choice. Roof leaks demand immediate attention, especially with cedar shake roofs. Water damage spreads quickly through wood, causing costly structural problems. CedarTech Roofing has your back. Our guide to DIY cedar shingle leak repairs will walk you through each step. You’ll learn professional techniques while understanding when to call the experts.
Find the Source of the Leak
While DIY roof repair has its pros and cons, it’s worth understanding the steps involved. To fix a cedar roof leak, start by finding the source of the problem. Leaks can cause more damage if ignored, so it’s essential to act fast. Use these steps to pinpoint the issue and prepare for repairs:
- Inspect Indoors First:Look for water stains or dripping in your ceiling or attic. Follow the water trail upward to find the general area of the leak.
- Check the Roof From the Ground:Look for cracked, damaged, or missing shakes. Use binoculars for hard-to-see spots.
- Take Photos of Damage:Document problem areas before climbing on the roof. This will guide your repairs and ensure you don’t miss anything.
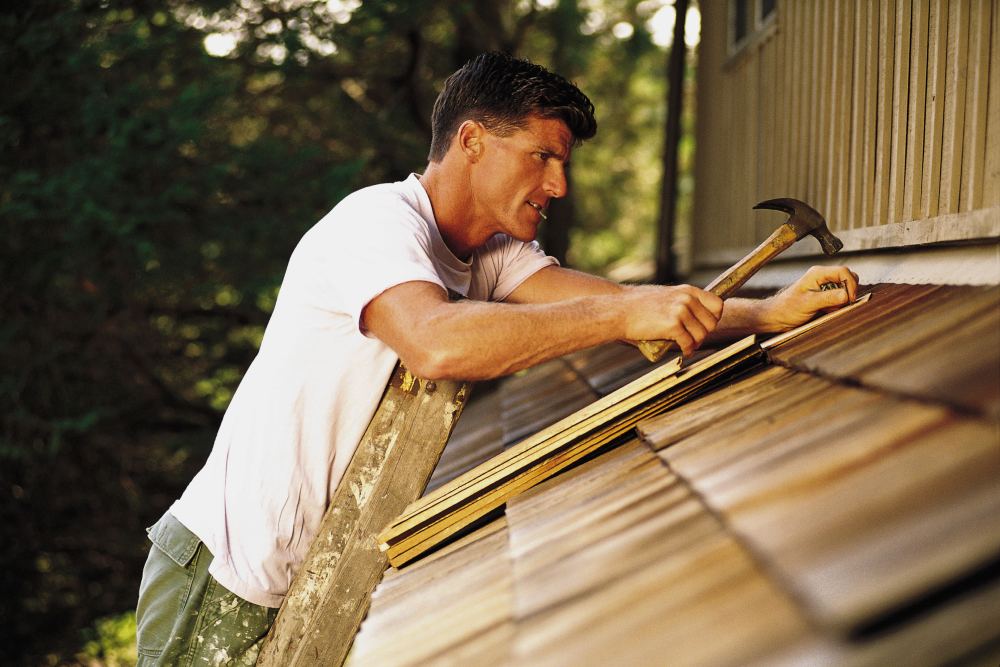
Getting Up on the Roof
Safety comes first when attempting DIY cedar shingles repair. Use a sturdy ladder and have on a pair of non-slip shoes with good grip. Have a spotter hold the ladder steady while you climb. Be sure to check the weather ahead of time. Even light winds can make roof work dangerous. Once you’re set, gather your tools before heading up: pry bar, hammer, roofing nails, replacement cedar shingles, and roofing sealant. Sheet metal patches and crimping tools are useful for providing alternative repair options. You should also pack a wooden block. This can help to support lifted shingles without damaging the surrounding area.
Lift the Affected Shingles Carefully
Use your pry bar to gently lift shingles around the suspected leak area. Cedar splits easily when dry, so work slowly and deliberately. Once they’re lifted, place your wooden block under the shingles. Examine the exposed underlayment for apparent damage. Look for tears, holes, or areas where water has pooled. The problem may extend beyond what’s visible from below.
Examine and Repair the Underlayment
Check the roofing felt beneath your cedar shingles thoroughly. Water damage appears as dark stains, soft spots, or actual holes in the ceiling. Cut out damaged sections using a sharp utility knife, creating clean edges for your patch. Replace damaged areas with new waterproof underlayment. If you’re not certain of this step, trust our team’s re-roofing specialists.
Using Sheet Metal for Leaks
Sheet metal offers another effective solution. You’ll need a piece sized to fit under your roof’s shingles, and to crimp the edges smooth to prevent snagging. Once you have the piece crimped, slide it carefully over the leak site under the shingle. Secure patches with roofing nails and apply roofing tape along seams for extra protection.
Improve Drainage
Proper cedar shake roof repair includes addressing drainage issues. Align shingles correctly so each course overlaps the one below. Remove leaves, twigs, and debris that block water flow. Adjust shingle placement slightly if water pools in specific areas. Good drainage prevents future leaks and significantly extends your roof’s lifespan.
Finishing Up Your Cedar Roof Repair
Once repairs are complete, lower the cedar shingles back into their original positions. Nail them down carefully, ensuring proper alignment with surrounding shakes. Small amounts of roofing sealant should be applied over nail heads to prevent water intrusion. Take your time with this last step. Rushed work often leads to additional problems, as cedar roof deterioration can be severe.
Test Your Repair With a Hose
Time to see if your repair holds up! Grab a garden hose and test the area you just fixed. A quick test now can save bigger issues later. Here’s how to check your work and what to do next:
- Spray the Repair: Drench the area briefly with a hard stream. This helps to mimic heavy rain on your roof.
- Check Inside: Have someone watch the old leak spot while you spray. No water means success – your DIY cedar roof repair worked!
- Plan for Next Steps: Temporary caulking can buy time if leaks persist. However, water tends to find new areas to pool, so your roof may need professional attention.
Trust the Professionals for Lasting Results
Cedar shake roof repair requires specialized knowledge and experience. CedarTech Roofing brings over 30 years of expertise to every project. Our certified roofers work directly for our company, with no subcontractors who cut corners on your investment. We offer free inspections and transparent estimates for all cedar roof repairs. Contact our team today for your professional consultation. Let our experience protect your home’s most important investment.